TrendNet TV-IP422 Surveillance camera
The security camera we have today on our test bench is the TV-IP422 wired version from TrendNet, there is also a wireless version for those who’re interested in a minimalistic installation design as the only cable you need to connect is the power cable.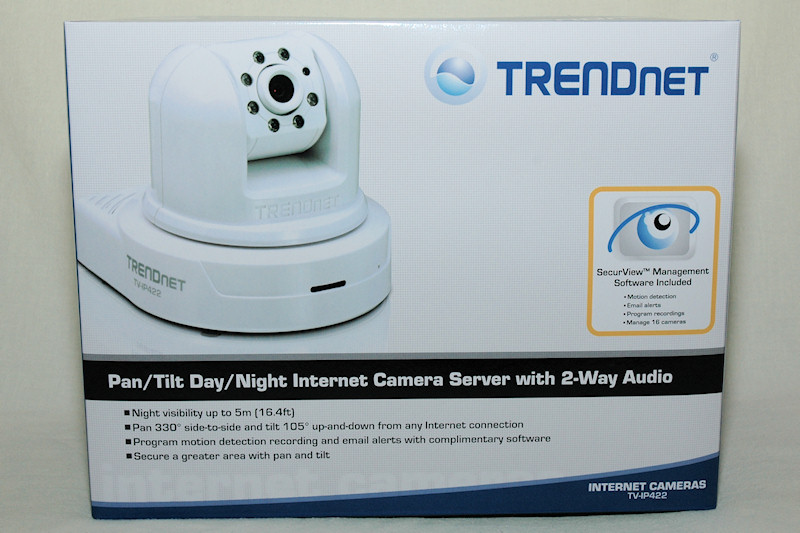
The IP422 comes in a clean looking box with a picture clearly showing what’s to find inside. It tells us that we should be able to see things in a pitch black environment up to 5 meters, thanks to the infrared diodes around the camera lens.
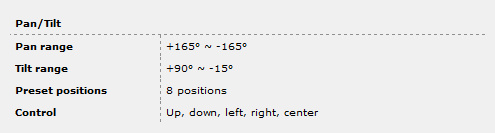
It is also possible to turn the camera head sideways for 330 degrees (Pan) and turn it up/down for 105 degrees (Tilt). Some more advanced cameras offer 360 degrees pan and around 160 degrees tilt. This is the first time I’m working with a non-continuous camera and it will be fun to see how it compares to the more expensive ones.
The back of the package gives us an idea on how to connect the camera network, it tells us that we get a 3-year warranty and that it is RoHS compliant (Restriction of Hazardous Substances Directive), which Wikipedia probably can help us explain Wikipedia.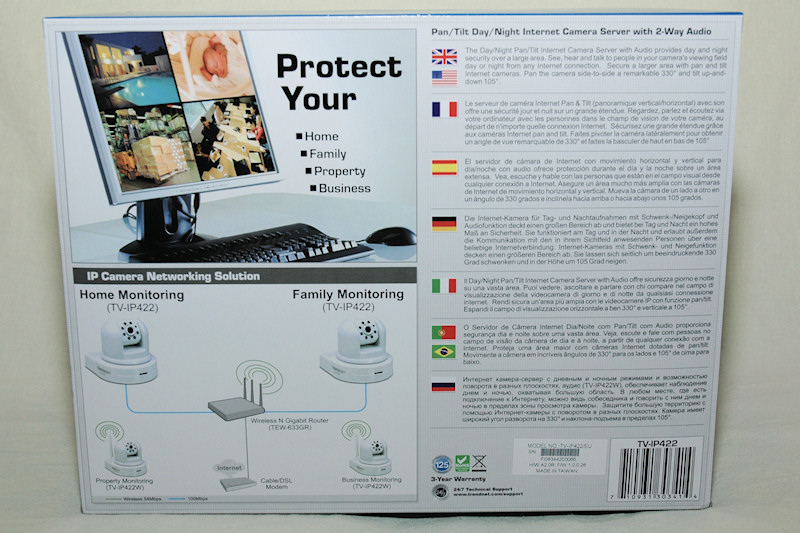
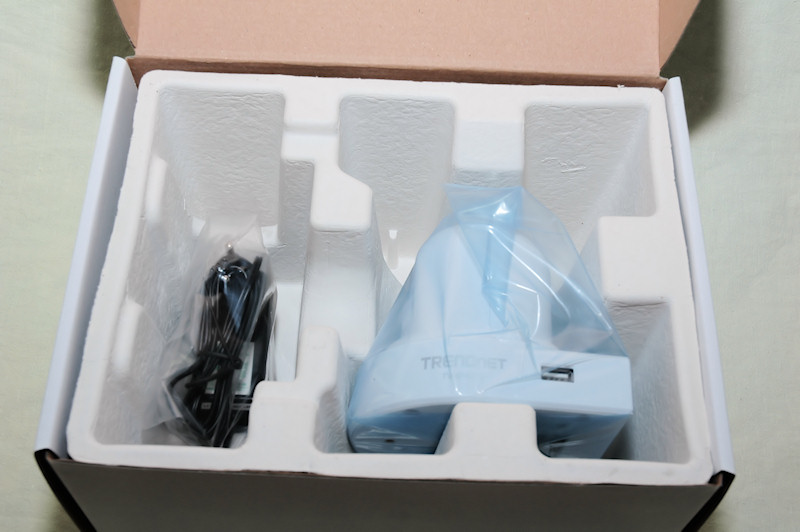

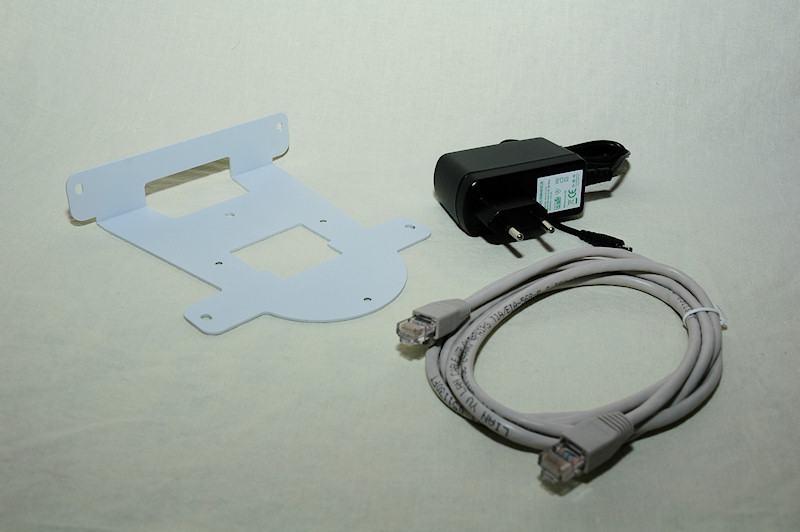
When opening the package we find the camera itself and the power cable. We also find a CD with software and a manual for installation instructions.
If we lift up the insert in the box we find a metal piece and also a CAT5 network cable. The “metal piece” is actually a mounting stand for the camera, to install it onto a wall or a ceiling.
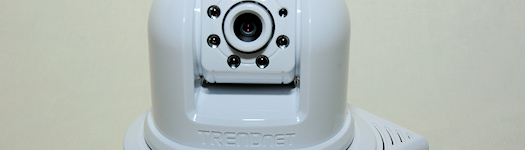
The camera itself has a very plastic feeling with a glossy finish but when moving it around and feel on it properly you notice that it seems quite sturdy. The lens is sticking out a bit as you can see on the picture below, this piece is actually rotating so that you can manage the focus of the camera.

The round things around the camera lens is, as I said earlier, infrared diodes which hop into action when the light sensor think the environment is too dark. The sensor is up at two o’clock when looking at the camera straight from the front.
We also have three details to note on the lower part of the camera. From left to right, the first one is a dual led plastic piece which shows if the camera has power (orange fixed led) and one led for network connection (green blinking led).
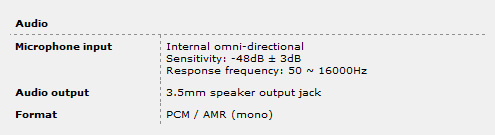
Next thing is the small hole to the right of the leds, this is the microphone.
Both the leds and the microphone can be turned off in the camera interface accessed by the browser.
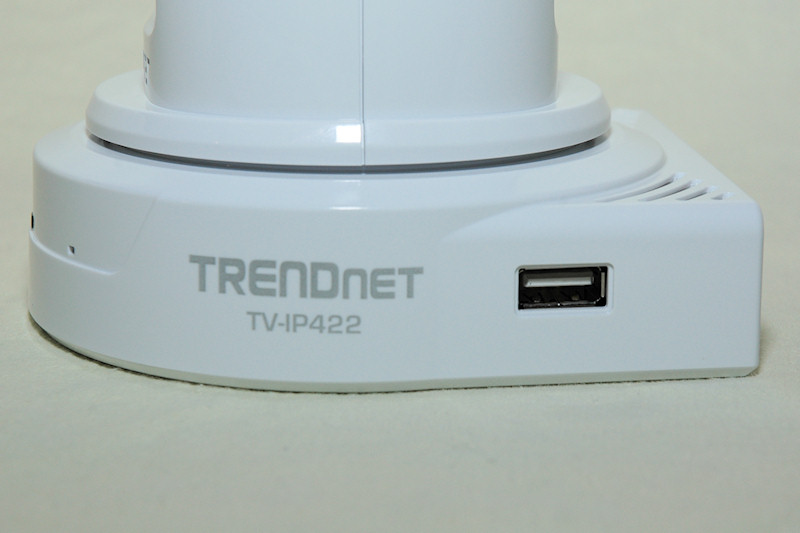
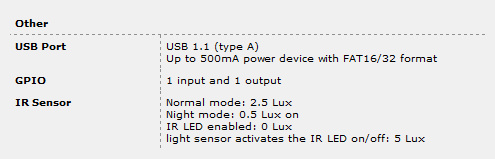
Last thing is the USB port where you can connect virtually any USB storage device. On this device you can store images and recorded movies from the camera.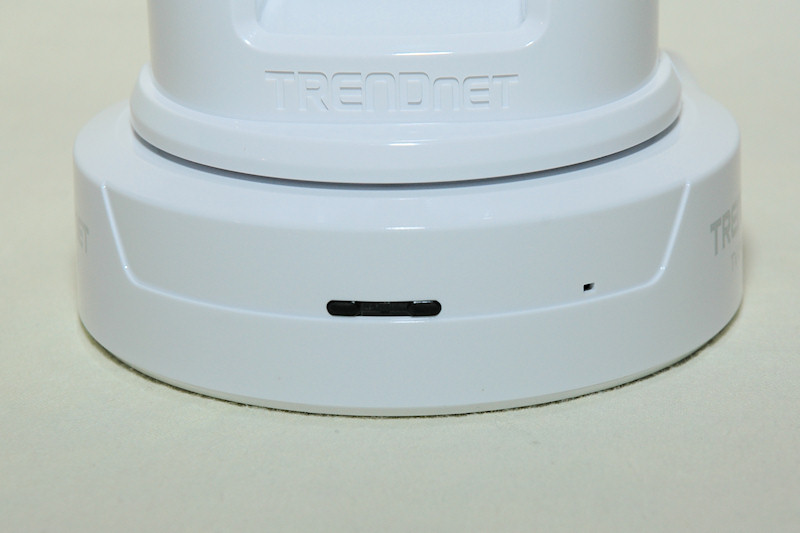
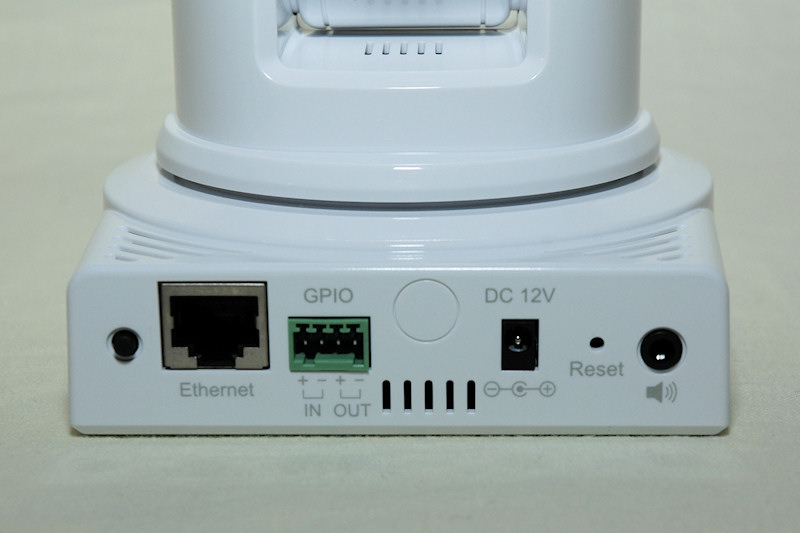
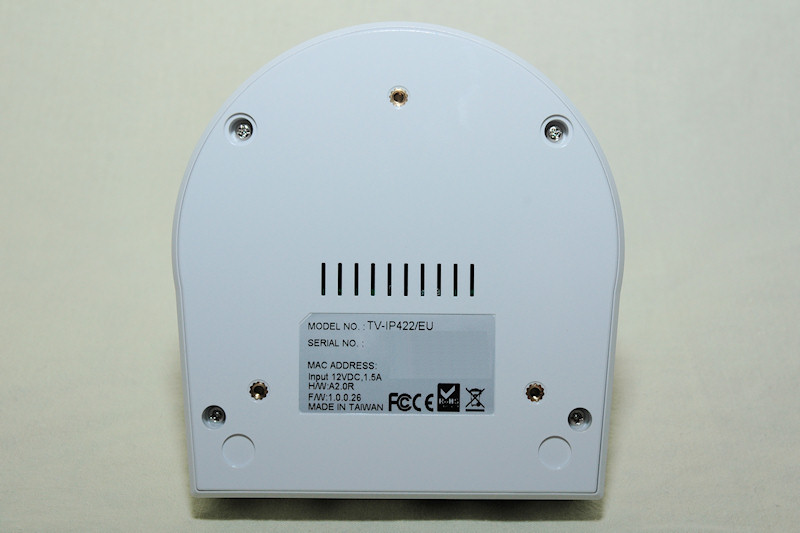
Let’s flip the camera around to its back. Here we can find some more connections, first off on the left is the unmount button for USB, so that you don’t have to access the web interface to disconnect it. Then we have the Ethernet connector, GPIO connector, the ring we see in the image on our camera is where the antenna would be on the wireless model.
After that we find the power connector and the reset button which when pressed quickly restarts the camera and when held for at least 5 seconds reset the settings to factory default.
Last connector is for audio-out if you want to connect a speaker to the camera for the 2-way audio function.
You might wonder what the GPIO connector is, well for example say that you have an entrance on which you install the camera. You might not be around to look at the camera all the time, but you’re the only one (on the inside of your fortress) who can open the door.
So you would probably like to know when someone is standing at the door and wants to enter. Easily done as you can connect for example a button to the IN part of the connector and perhaps the door lock on the OUT part.
This way when someone press the button at the entrance it can signal you on a pling-plong bell or something similar and you can go to the monitor where you can see the camera and activate the OUT part of the GPIO connector which disable the door lock and they can enter the door.
But if there is someone on the outside that you want to keep there or if there is someone with a question you could install a speaker and activate the microphone on the camera so that you can speak with them, which is a lot better than having to go to the door and tell them to go or answer their question if you feel like it.
Extras in the package are installation screws for the wall mount, rubber feet’s and an easy to connect GPIO connector.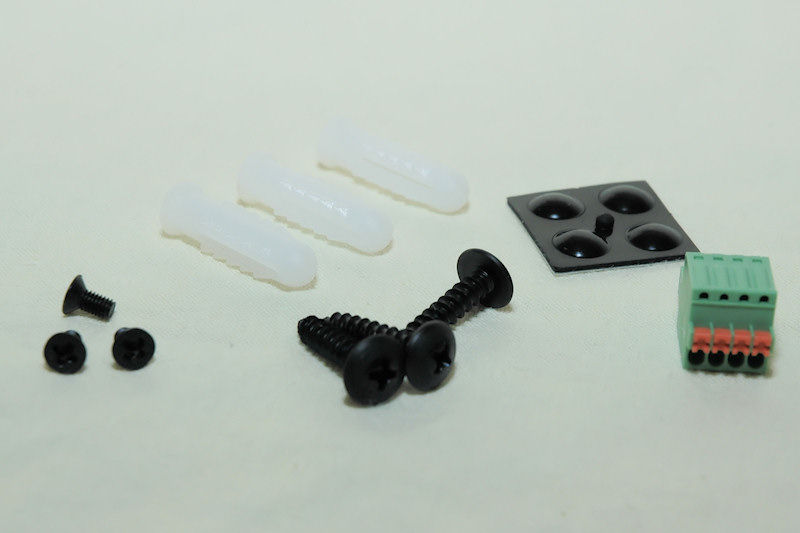
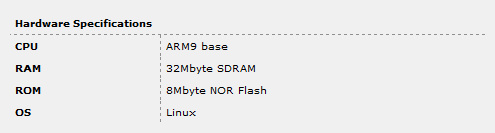
Last thing to note here is that the IP422 is running Linux on an ARM9 microprocessor. It has 32MB of SDRam and 8MB of system flash on which the Linux system is stored.
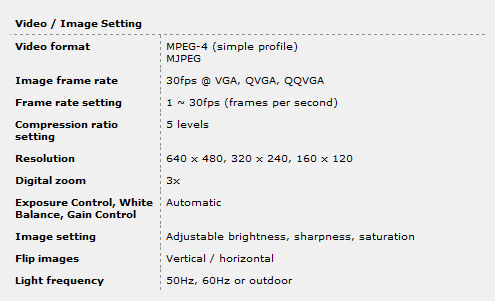
All the specs tablewise, enjoy :)

On next page we’ll take a look at the interface.

Christopher Fredriksson


![[H]ard|OCP, https://www.hardocp.com](https://swemod.com/uploaded/affiliates/hardocp.jpg)
![[M]adshrimps, https://www.madshrimps.be](https://swemod.com/uploaded/affiliates/madshrimps.jpg)